Hi, hope you guys doing well.
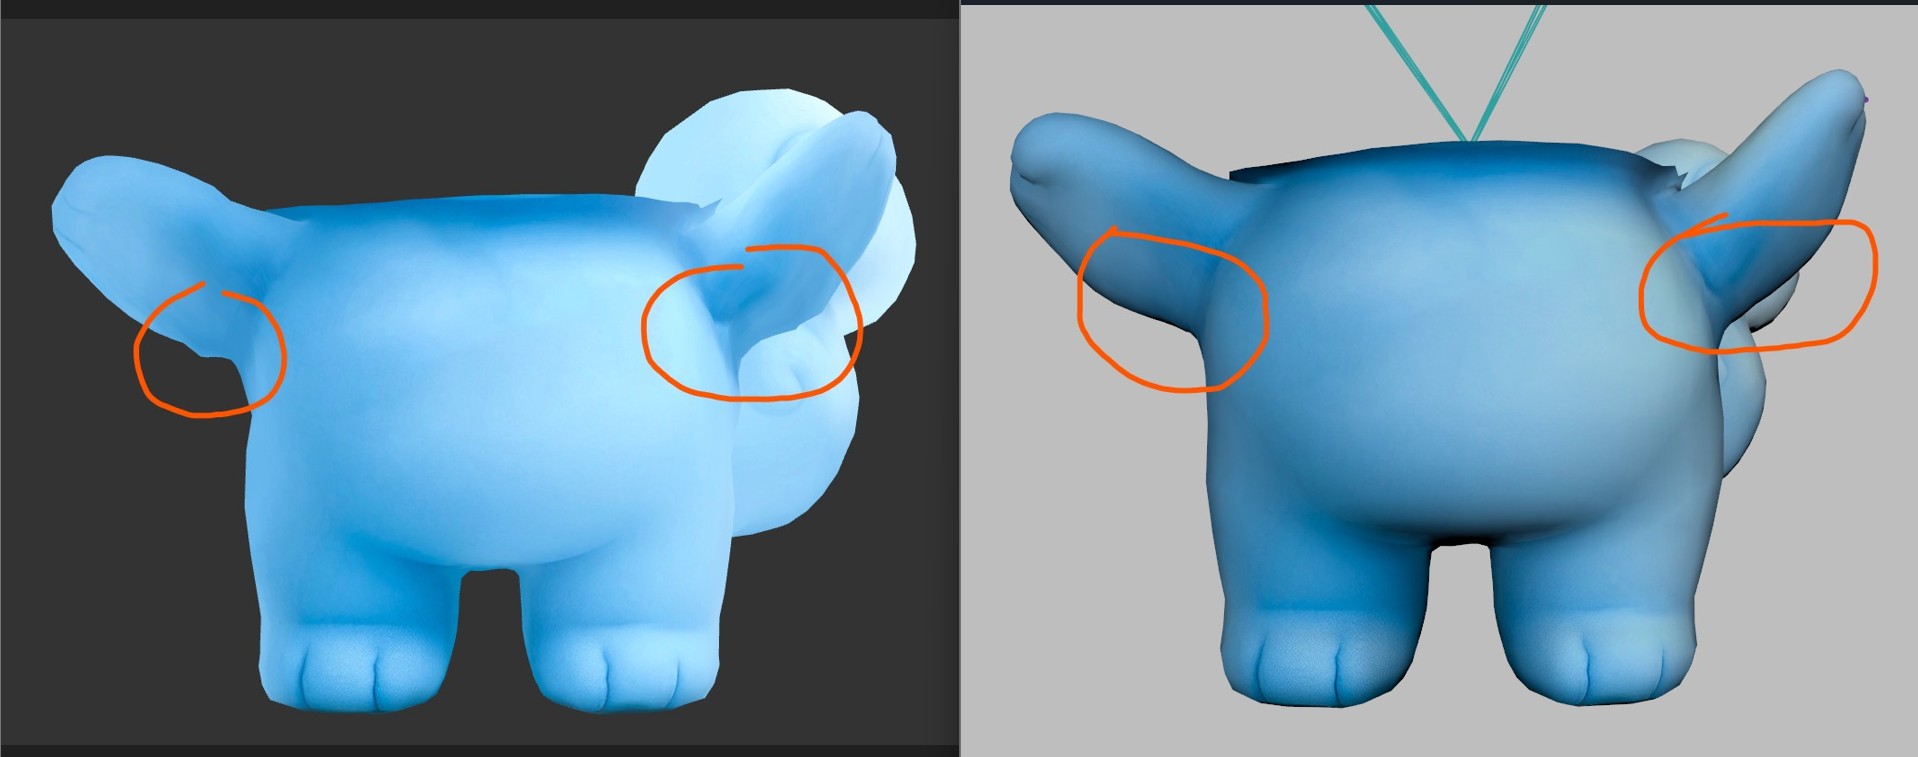
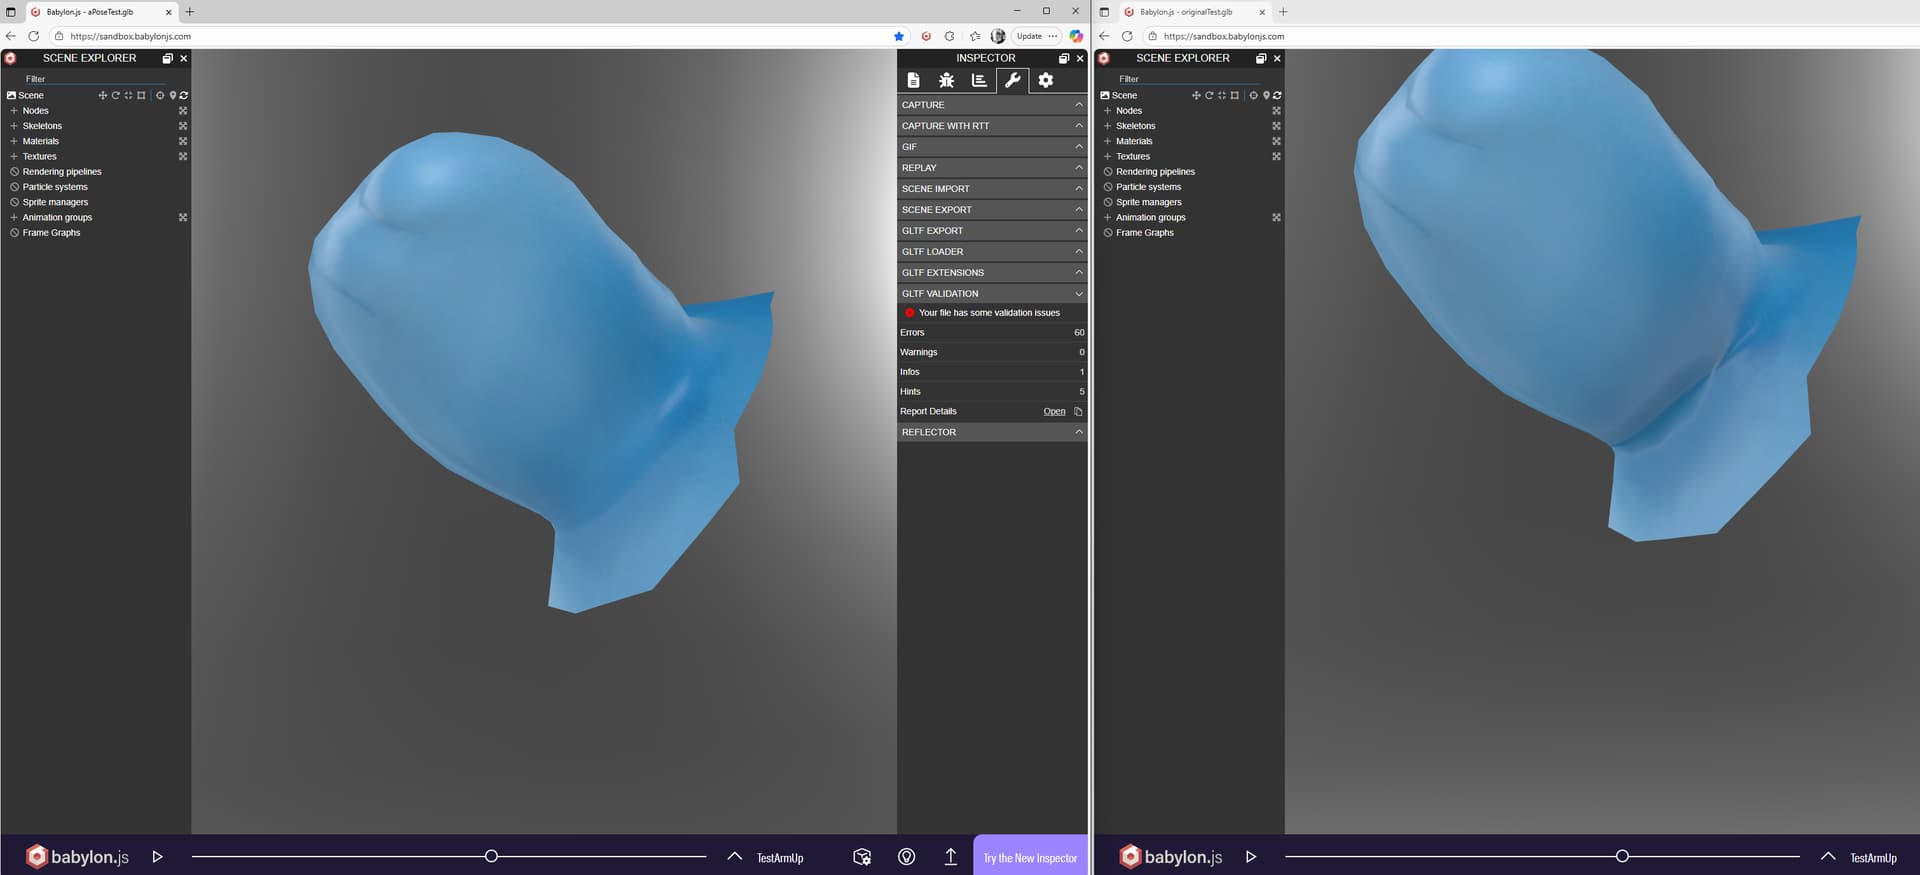
The issue I have is that in Maya the model seems smooth but in GLB it has these pointy issues. Here is the maya and glb file
Hi, I hope you’re all doing well. I wanted to mention that this issue is impacting my work, and I’m wondering if there are any plans to address it. If there is no plan or it’s not a priority, I’d appreciate it if you could let me know. Thank you!
Hi @Raymon , how are you doing? I’m really sorry, I ended up missing you post. Thank you for sending a repro, I will take a look today. I let you know if this is something we can fix in the export or if it is something else.
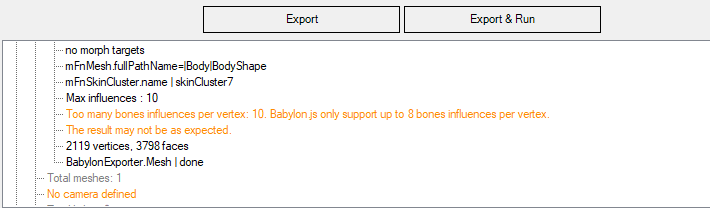
@Raymon , have you tried unchecking “optimize vertices“? Also, I noticed that your files gives me warning about having too many bone influences per vertex (total of 10) while Babylon.js only supports up to 8. I think this could be causing issues when running the skeleton animation. Would it be possible for you to limit the number of influences?
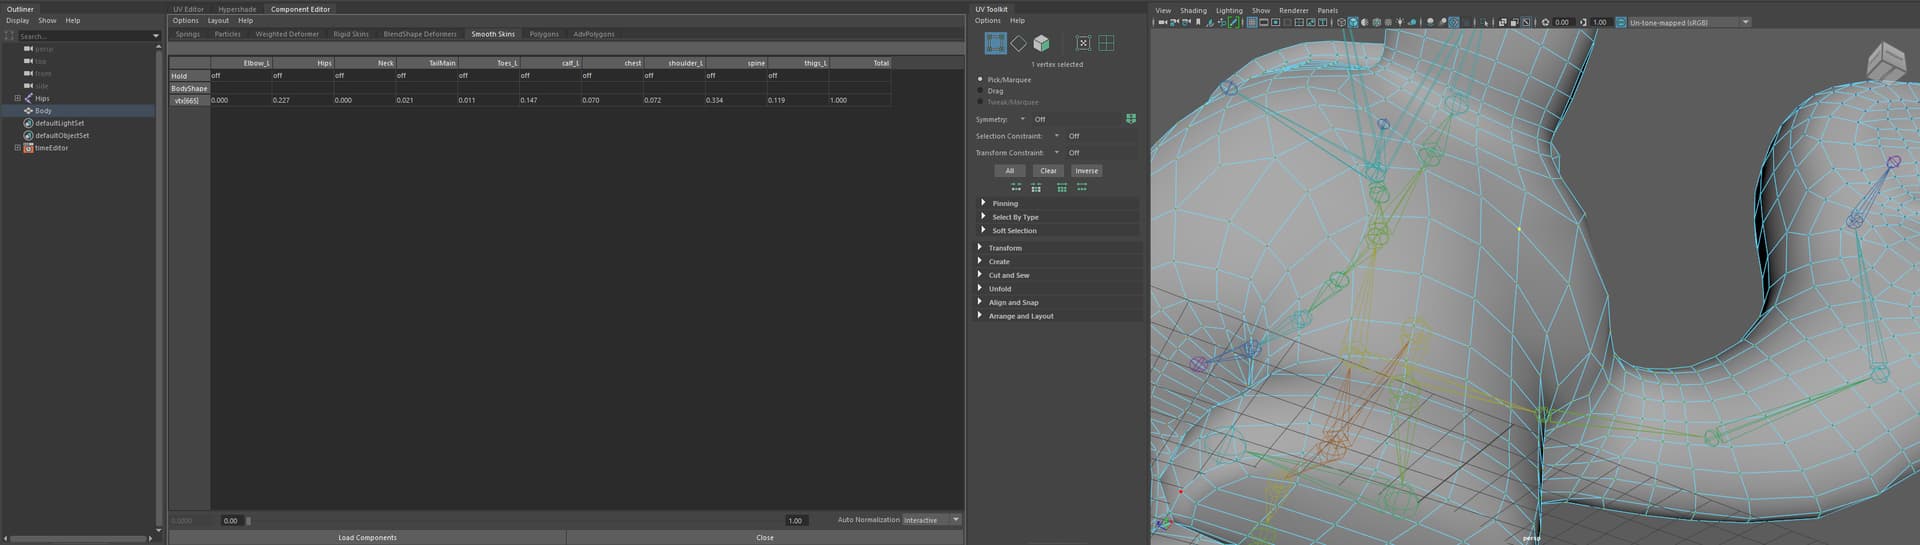
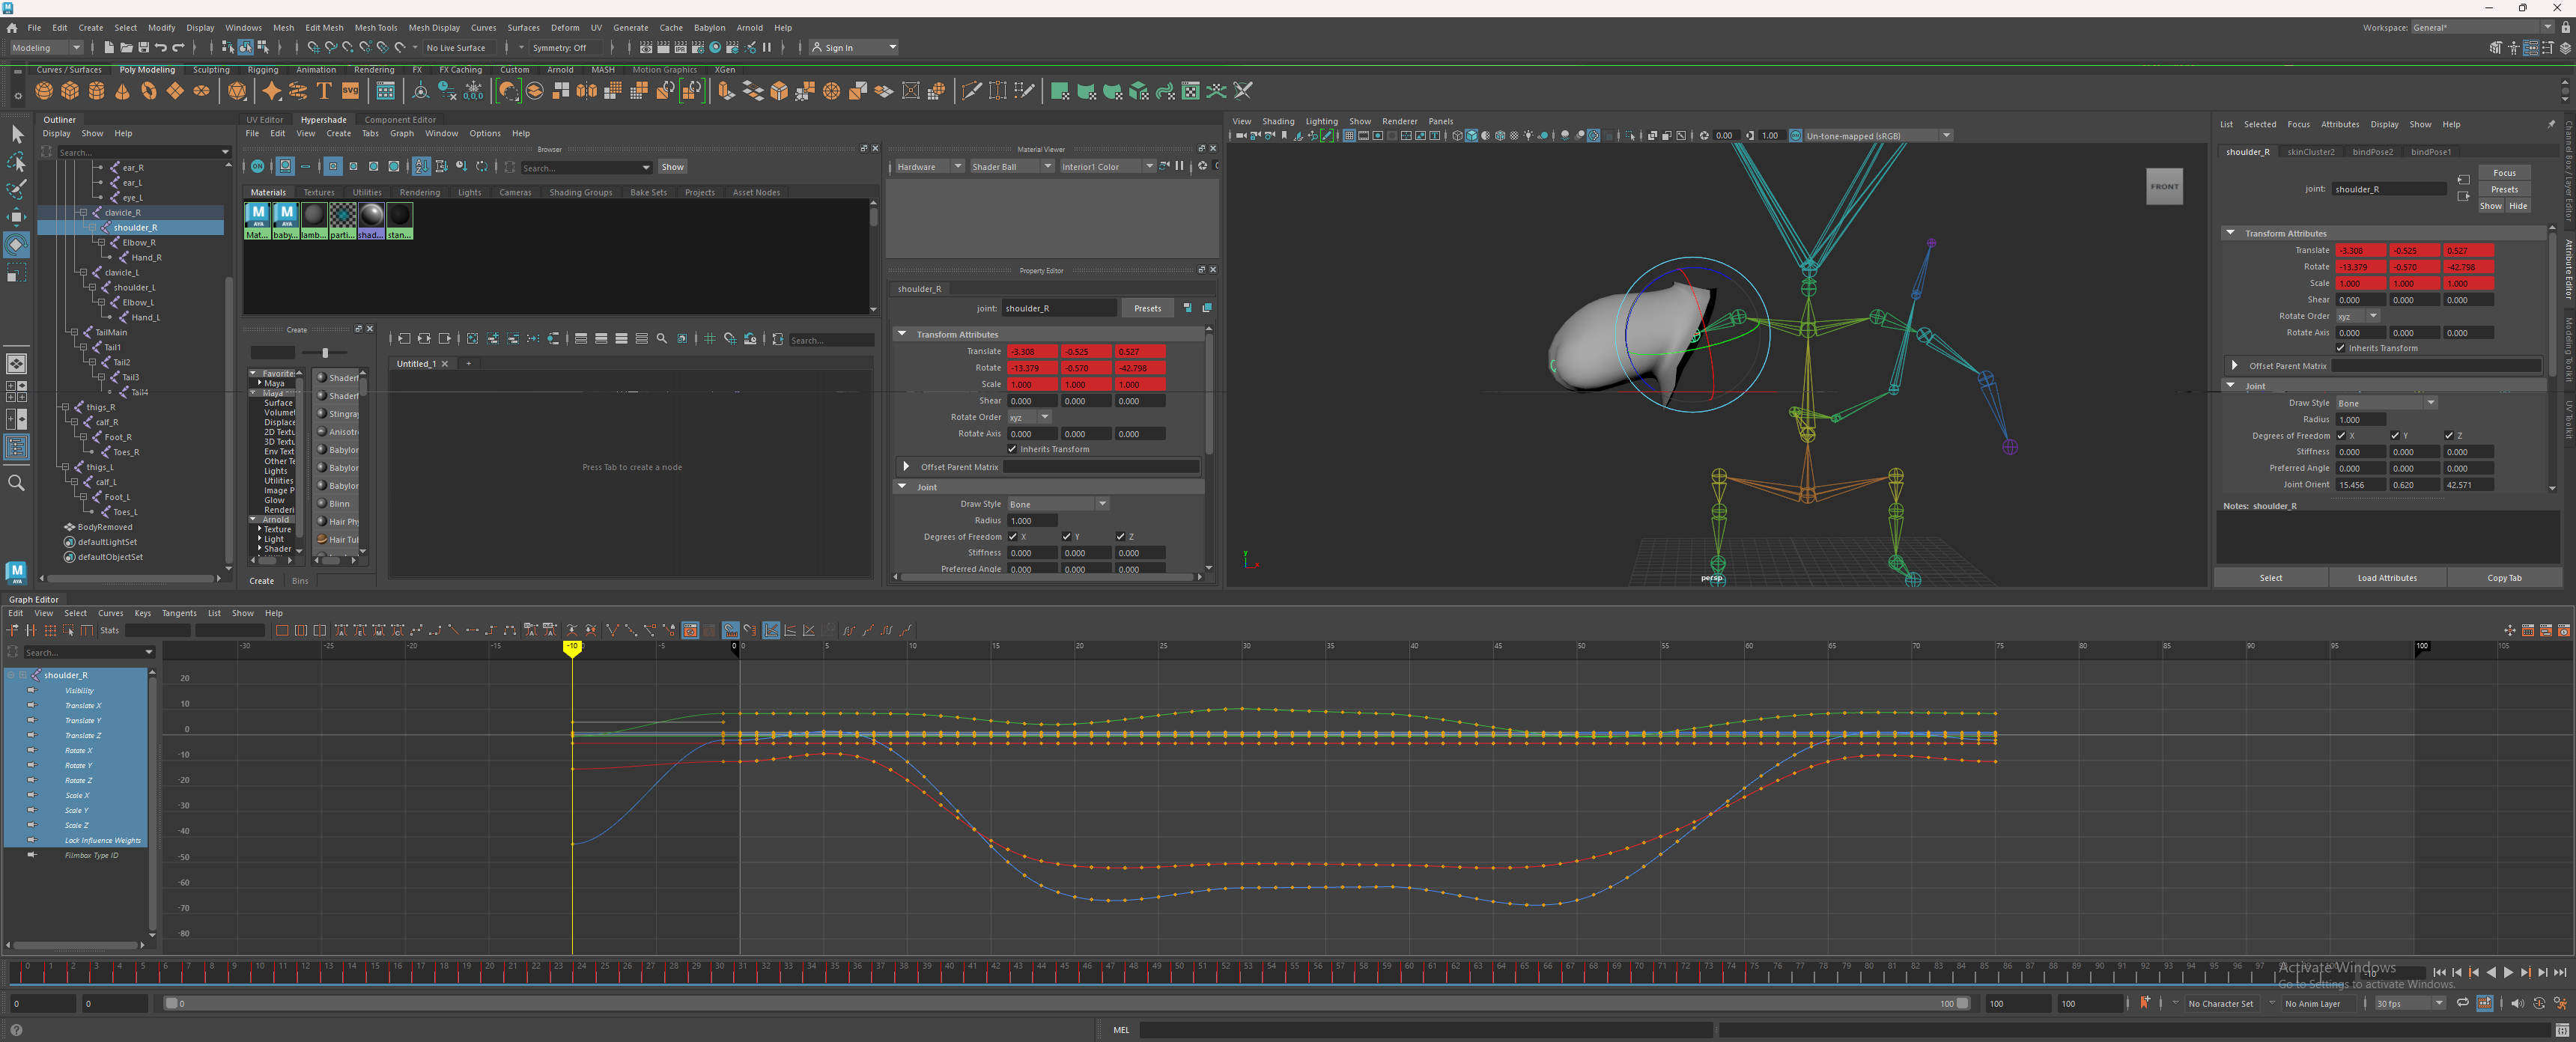
@Raymon, what I am seeing in the mesh you provided (thank you for sending it) is that your mesh is skinned to sometimes 10 different bones in your skeleton. This is one of the vertices I found with 10 bone influences. I have the component editor set to hide columns with zero weight so the fact that there are a couple with 0.0 showing tells me that the influence is small enough to round to 0.0, but is not considered 0.0 by Maya. I also found that there are a lot of validation errors on your file with a non-normalized accessor value, and I suspect that these skin weights are adding up to a little over 1.0.
Babylon only supports 8 bone influences per vertex so what may be happening is that some influences are not present in the final render and so the vertex position is looking off. Ideally, you would only use 4 influences per bone for performance reasons, but we do support up to 8. If you decide to use node materials, though, you need to add the extra indices and extra weights nodes on your bones node to account for influences past 4.
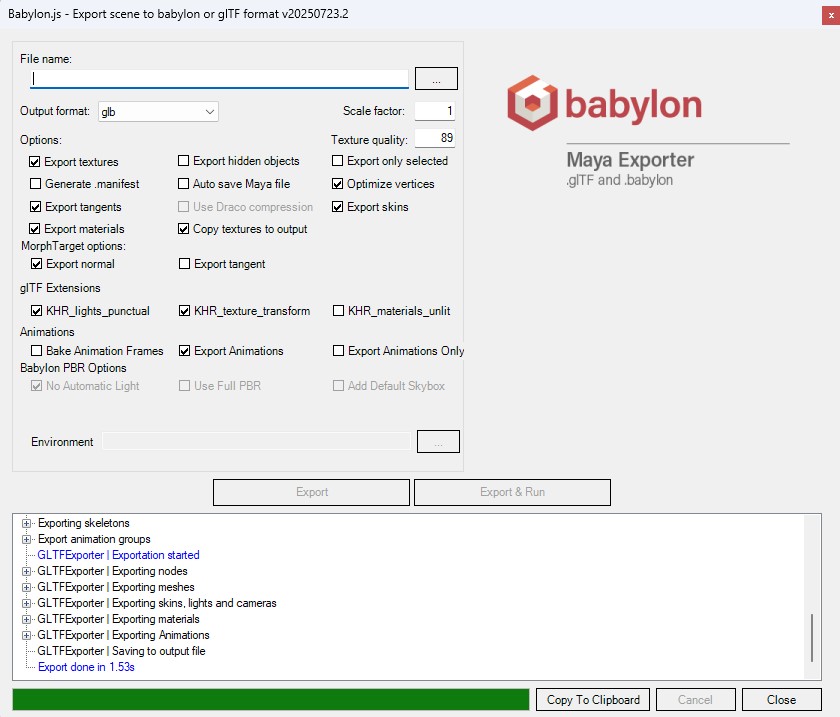
One thing you can use to check your file is the output log on the exporter window as this will tell you when you have too many influences. This is what I saw when I exported your file:
For second one and for simplicity I removed most of the mesh and kept only a part with visible glitch. This part no longer give warning during export since maximum use influence is 5 but problem still exist. (i attach the file so you can test)
by accident I noticed a new thing which is if I export in frame 44 (middle of animation instead of frame 0) the glitch in that frame is gone but a new glitch in frame 0 will be created.
However, I think the issue you are seen now might be related to normal been too unstable under the arm. Looking at the vertices data they see to be at the correct place, but normals values get too extreme because the edge of the arm has such a narrow angle. One thing you could do is to export the model in T pose, this way the bottom part of the arm will be better defined normals. From the plugin side we don’t mess with the normal values we just take them directly from Maya.
Thank you @srzerbetto
Regarding update: unfortunatly it didn’t had any effect on output
for T pose: The original model is in A pose with animation seperated (same issue) I tested in T pose and it will get better but create new issue under arm instead (too much bend). I also tried subdiving but still same problem.
Do you have any other suggestion or what might cause this?
@Raymon, the issue with the normal errors under the arm have to do with the frame the mesh is exported at. If I export the mesh on a frame that is A-pose or T-pose, the normals baked into the mesh are more expected across the range of deformations. To illustrate, I exported the left image with the play head on a frame with the arm raised from the side. The right image was exported as you had originally set with the play head on frame 0 with the arm at the side:
You can see that the lighting errors are gone from the render on the left as the normals from the mesh are more relaxed and do not have large angle deltas from loop to loop through the armpit. The way I accomplished this was to use the negative timeline values to set my pose and exported with the play head on that frame.
You can see I dropped a key on all frames at -1 (just select all bones and press S with the play head on -1 in the Graph Editor) so that I didn’t have any drastic tangents coming into frame 0. Then I moved back to -10 and rotated the arm to a more relaxed state in the armpit and set rotation keys on that frame. Now if I set my play head on -10 when exporting, I get the relaxed pose, but since the timeline is negative, the exporter won’t export data from that range. But the mesh is built from that frame, so the deltas on the normals are less than the pose on frame 0.
So basically, you can leverage the fact that we don’t export anything from negative frames to store an A pose or T pose to ensure that is the exported pose without needing to bake that pose into animations in the glTF. Let me know if this doesn’t make sense.