~ aFalcon: Deep~Dives


~FIBONACCI~EXPERIMENTS~ continued...

As always, the 1st attempt to simplify the fibonacci algorithm was flawed.

But in a lucky way. Because…

every flaw reveals an insight.

And this flaw no different.


Here is the thing though…

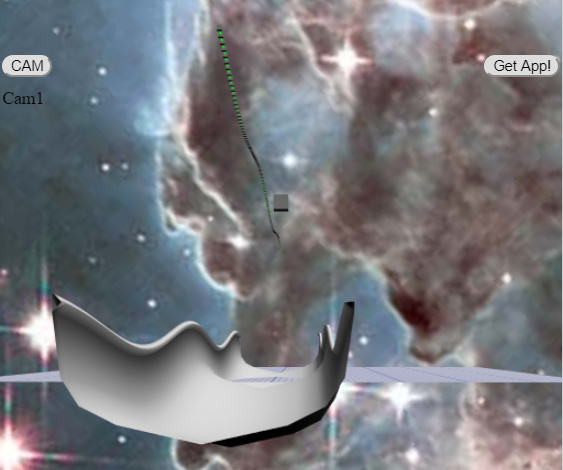
The curve noise twists the halfpipe in the way we are looking for!

The elusive BANK or ROLL on the axis.

WHAT??? No way. Yes… Check it out!

A Fibonacci sequence “loosened” or “tightened” with noise, twists the curve in or out!

SAME AS: ExtrudeShapeCustom.rotationFunction - but for the whole curve in a single number.

NOTE: the Custom RotationFunction is set to return 0…

So this gets interesting!

The concept of tightening and loosing the noise in the fibSEQUENCE - has many surprises.


If you want tighter~corners on your HALFPIPE or MOTOCROSS, or Bobsled … TRACK , then:

  • add negative noise to the Curve!

In this case… the Fibonacci Golden Ratio.


As usual, there is more to it… HERE IS THE GOOD STUFF :tired_face:

too long did not read. I know.

The OPTIMIZED Fibonacci was SIMPLIFIED and ENHANCED into a FACTORY-PATTERN.

fibFactory()

Like this…

    function fibFactory(fib){
        var nextFib = fib.lastFib + fib.thisFib + fib.curveNoise;
        return {thisFib:nextFib,lastFib:fib.thisFib,curveNoise:fib.curveNoise,fibLength:fib.fibLength};
    } //EXAMPLE: fibFactory({lastNum,thisNum})//1,2,3,5,8

You can see the curveNoise in there. Making it -0.4 gave nice inward curve.

-noise:0 can be added to the factory-configuration-object, along with length:1000, as you can see.

In the graduator… the “grade” and “affect”… can be any INDEX.


EXAMPLE:

anm the opacity, we think with size, is how to make CLOUDS? On a rotation and position noise, around fib points, to get a cluster… ?


Below is an attempt to graduate noise across many indexes and see - does that turn spheres into clouds?


STORY:
There is this fine-digital-artist name… CreativeShrimp. Really admire him. His medium is Blender.

Maybe YOU know of him? He is a Creative Genius. Also very good at communication.

One particular conference - he pointed out an AMAZING trick - to make things BEAUTIFUL!


The SECRET to BEAUTIFICATION - as told by Creative Shrimp, is 3 THINGS:

  1. Large, big shapes in the distance, to define the depth of the scene.
  2. Medium, smooth surfaces that give quick insight as to what is around us.
  3. Small, clusters of detail, where we can focus our eyes, and be delighted by what we find.

Anyway… you can watch the VIDEO - it is VERY AMAZING, or just TRUST the dog in sunglasses, the moral of this STORY is important!!!

CONCLUSION:

It seems to be, that the shape of a CUMULUS CLOUD… might be like that?

Big outline, medium definitions, and small details? Let’s see…


A good Start. This effect occurs with the use of the 2 GRADUATORS (above) SIZE and YPOS.


Here is a “graduator”

(i<8) ? i/2 : i*2

a ternary-operator, that either slows or accelerates an offset (noise).

placed on any idx.

Here is a FULL SPIRAL:

    var thetaSpiral = 0;
    var circleScale = 200; //spins the spiral!
    var fibNum = {lastFib:0,thisFib:1,curveNoise:-0.3,fibLength:100};
    for(var i=0; i<=fibNum.fibLength; i++) {
        var sphere = BABYLON.Mesh.CreateSphere("sphere", 3, (i<8)?i/2:i*2 , nx.scene); //graduator on size.
        sphere.position = new BABYLON.Vector3(0, (i<8)?i/2:i*2, 0); //graduator on y position
        fibNum = fibFactory(fibNum);//adds-two-numbers-together-and-returns-a-thisFib-.
        sphere.position.x += (Math.sin(thetaSpiral)) * (fibNum.thisFib/ circleScale) 
        sphere.position.z += (Math.cos(thetaSpiral)) * (fibNum.thisFib/ circleScale) 
        thetaSpiral += 0.5;
    }

Check Out: Y POSITION, and Circle SIZE.

Also, note ENCAPSULATION into the Fibonacci Factory?

The graduators could be added as… yPosIdx:fn(){}

…on each idx. : )

and anms across time. :tornado:


More cool things!?!

The thing about Ficonacci Sequence is how it extends across size and time in a remarkable way.

So the SEQUENCE can be Graded with graduators.

SIMPLIFIED~FIBONACCI~FACTORY

    function fibFactory(fib){
        var nextFib = fib.lastFib + fib.thisFib + fib.curveNoise;
        return {thisFib:nextFib,lastFib:fib.thisFib,curveNoise:fib.curveNoise,fibLength:fib.fibLength};
    } //EXAMPLE: fibFactory({lastNum,thisNum})//1,2,3,5,8
    var thetaSpiral = 0;
    var circleScale = 200; //spins the spiral!
    var fibNum = {lastFib:0,thisFib:1,curveNoise:-0.3,fibLength:100};
    for(var i=0; i<=fibNum.fibLength; i++) {
        var sphere = BABYLON.Mesh.CreateSphere("sphere", 3, (i<8)?i/2:i*2 , nx.scene); //graduator on size.
        sphere.position = new BABYLON.Vector3(0, (i<8)?i/2:i*2, 0); //graduator on y position
        fibNum = fibFactory(fibNum);//adds-two-numbers-together-and-returns-a-thisFib-.
        sphere.position.x += (Math.sin(thetaSpiral)) * (fibNum.thisFib/ circleScale) 
        sphere.position.z += (Math.cos(thetaSpiral)) * (fibNum.thisFib/ circleScale) 
        thetaSpiral += 0.5;
    }


Someday… BABYLON. CLOUDS!

CLOUD-PLAN:

  • Noise graduators on rotation spin, and anm the opacity and size idx, around fibPoints.
  • Multiple random curves… perhaps, fibonacci curves of fibonacci curves.
  • Would be very cool to continue() an opposite facing fib spiral.
  • Check it out 2 PATTERNS. Of triples and quads.

:dark_sunglasses: Sorry, I WRITE TOO MUCH!
:bird: Will condense.
:dog2: Just experiments, and…
:tornado: TLDR; Fibonacci builds a tornado, clouds?

Open to other variations, and,
Hope this helps someone,

TLDR; - Fibonacci curves.

1 Like

Are you tying to extrude a shape along a path and control the direction that the extrude faces?

Just checking if I caught some of this correctly before I chime in.

On the topic of clouds, do you want a method for raymarching volumes, I have a procedural way which is a little choppy still but was mulling around a method that uses the 3d texture as a volume map.

If you add that with a simulation pass we could do smoke and clouds and other cool things.

1 Like

Hi Pryme8, great to see you again! The last time you impressed me with “Fish Physics”. That was over a year ago.

Yes on all questions. Thanks.

Extruding a shape has been challenging to ROLL. rotateFunction working well in ExtrudeShapeCustom. It is awesome. But issues in “continue”. :smile:

So,trying to solve that. And learning a ton!

Raymarching volume map - sounds great, yes please share. Researching it.

Sounds cool. Thanks for the tips. :slight_smile:

UPDATE:

HOW-TO-BUILD-A-HALFPIPE-IN-SPACE:

(it wasn’t easy)

image

There were a few different problems combined.

  • How to CURVE the pipe was one.

  • How to ROLL was another.

Then there was

  • How to get many pipes to align together “seamlessly”

I will provide those solutions here. : )

2 Likes

hi look for this
https://www.babylonjs-playground.com/#A4XZV1#1
GeometryBuilder!!cutxz
https://www.babylonjs-playground.com/#A4XZV1#3

{ level:720,
seg:5,
stp:10,
holeStyleRadius:10,
holeStyleLength:120.,
holeStyleAngle:120 ,
holeStyleDown : 100
}

1 Like

Rock and Roll, Rock and Roll - Rock and Roll! :black_heart::sunglasses::musical_note::musical_score::bird:


GEOMETRY BUILDER for BABYLON!!!

link above: GeometryBuilder

Holes!?! :slight_smile: :black_heart:


As always → really great work! @nasimiasl

Canyons, Sand Dunes, Volcano’s!!! :tornado::mount_fuji::volcano:

And I SEE THE TORNADO - it is… magnificent!

1 Like

Exciting things upcoming with…

ANMETHODOLOGY

Today - I stop the jokes.

1 Like

if you like i can make video for start learning GeometryBuilder

1 Like

Yes, like to learn GeometryBuilder very much!

Trying to figure it out…

Happy to help promote, attribute, and give feedback.

Upcoming projects may be great for continued improvements: Canyons, Sand Dunes, Volcano.

Very happy to help with this Nas!

RIBBON EDITS!

1 Like

QUESTION: in search of PERFECT CURVES!!!


So far, success creating 1) individual curves then 2) linking them together and 3) smoothing the math.

But HOW TO CREATE PERFECT CURVES?

image

This is a HALF-PIPE in SPACE. It is fun to surf, PASS. But zoom out and CURVE JOINS are still noticeably lumpy! Even after the spline smoothing in one continuous path … and many hours of manual pos and rot and convert to world_position.

Maybe you guess the CHALLENGE seems to be around aligning TANGENTS.


GOAL: easily creating PERFECT~CURVES.

BONUS: Also be great for CHARACTER PATH ANIMATION.

Best GUESS is:

  1. ADD Gizmo to PATH then manually position x,y,z and console.log(path.stringify)

AND

  1. Add Gizmo to PATH POINTS and manually stitch the path together.

AND

  1. Add CURVE EDIT points.

OR

  1. use BLENDER (but nah!)

Is there any other option I’m missing? Any tricks or tips to get PERFECT-CURVES???

Hello MATH?

UPDATE: We can use moving-average to rotate tangents with in angle variance? Yikes (next week)

Guess I’ll build a triple-use path-gizmo since that is within my ability level Epsilon.

Bezier and CatmullSpline PATH-EDITOR… would be really cool. :slight_smile:

ALSO - far outside my radial orbit… for the moment. :grin:

Thanks much!
aFalcon

1 Like

Maybe use the connection point as the middle point in a Quadratic curve, then a point in the middle of the first and second curve as the endpoints. Generate it then blend the values between the curves?

or you could use maybe a Quadratic nth power curve, or a B-spline - Wikipedia

I would go with a bSpline.

1 Like

Nice! Ok…

Attempting a BSpline editor… (again)

UPDATE: a SIMPLE path can be EDITED 3 ways! 1) xyz 2) points 3) curve.

Or more? MORE! (below)

SUCCESS:

image

Step 1 - halfpipe editor.

2 Likes

so bSplines worked then?

SOLVED… Curve3 was all that was needed (for EDIT 1 and EDIT 2)

it doesn’t use Path3D. Just a bunch of numbers in an Array.

The curve appears applied in the rendering of ExtrudeShapeCustom

  • CURVE EDIT 1, is origin transform

  • CURVE EDIT 2, is point transform

Yes, CURVE EDIT 3, would be BSPLINE and CATMULL, ect.

1 & 2 meet requirements: SMOOTH~CURVES! So need to move on.

Design includes:

EDIT~MODES

Multi-Select: GREEN, BLUE, deselect (extensible to scale and curve).

image

AND 10-Key-Editor

  • remember vim!?!? :grin:

QUESTION: How to ADD 10-KEY controls to CAMERA?

10 key control? hmmm wanna explain that, are you talking with like yaw pitch roll and directional vector or something like that without the mouse?

1 Like

Yes!

Concept: edit with 10Key, multiple-select with mouse. :grin:

Can drive CAMERA the same way, w/ multiple MODES.

1st, here are bindings for EDIT~MODE:

                //------------------------------------10-KEY-EDITING-.
                case 104://numpad 8FWD
                    nx.edit.zplus;
                    break;
                case 102://numpad 6RIGHT
                    nx.edit.xplus;
                    break;
                case 98://numpad 2BACK
                    nx.edit.zminus;
                    break;
                case 100://numpad 4LEFT
                    nx.edit.xminus;
                    break;
                case 103://numpad 7UP
                    nx.edit.yplus;
                    break;
                case 105://numpad2 9DOWN
                    nx.edit.yminus;
                    break;
            //NUMPAD-CHARACTER-CODES
            //1:97,2:98,3:99,4:100,5:101,6:102,7:103,8:104,9:105,0:96,+:107,-:109.  

Up and down are 7UP and 9DWN. Then yes - yaw, pitch, roll, including zoomin, zoomout, ect. ALL.

Just moves anything in the SelectedNode array ;

MAGNITUDE: Ctrl, Alt, Shift

EDIT~MAGNITUDE:

            if(e.shiftKey) { nx.edit.MAGNITUDE = 100 }
            else if(e.altKey) { nx.edit.MAGNITUDE = 10 }
            else if(e.ctrlKey) { nx.edit.MAGNITUDE = 1 }
            else { nx.edit.MAGNITUDE =  0.5}

This is needed as CAM transcends SIZE-.

10Key~Control of CAMERA is just to apply movements (same as EDIT) but to ACTIVE CAMERA.

5 Key is MODE key. Switch into: CAM-MODE, EDIT-MODE, GAME-MODE, and ANM-MODE.

Pressure-suit! :grin:

SURPRISE! It breaks…

What???

The POINT-EDITOR works gr8, but in extrude PERFECT~CURVES remain elusive!

The boxes above show the intended result - and a the undesirable result below.

GUESSES:

  • local coordinate issue… will look at that. Not it.
  • can visualize the underlying path. Not it.
  • and jump into the source code to see what is happening - it could just be in the rerenderer. Not it.

SHOWING PATH (red and green) - loaded straight into ExtrudeCustomShape:

A relatively smooth path has unintended results. Any ideas?

I’ll make a PG.


SURPRISE! the points are TOO CLOSE to extrude. Stretch out the Path to Decrumple. : )

Also (below) master magus describes how a low-pass-filter can be used to reduce variance on a moving average - to within a range. AND it was pretty epic. Off to get the link…

Also, SURPRISE on this experiment the MAGNITUDE of Edit (0.1) was too much! Because of proximity of POINTS, and so needed to be 0.01 - to be within VARIANCE!

But, if YOU are building a STRETCH halfpipe… the MAGNITUDE of edit 0.1 would be aok, because of the STRETCH. : )


So strange… how it is, yet it is.

image

SOLVED! Moving on…