Hi link2twenty,
I think this depends on what exactly you’re aiming for. Is your goal to render a specific video on a specific mesh? If so, probably the “right” way to go about it is to tailor that mesh to work for that video, setting the UVs so that it only samples from the video in the places you’re interested in. If, however, your goal is to be able to play arbitrary videos on arbitrary geometry with full control of the aspect ratio, you might need a custom shader.
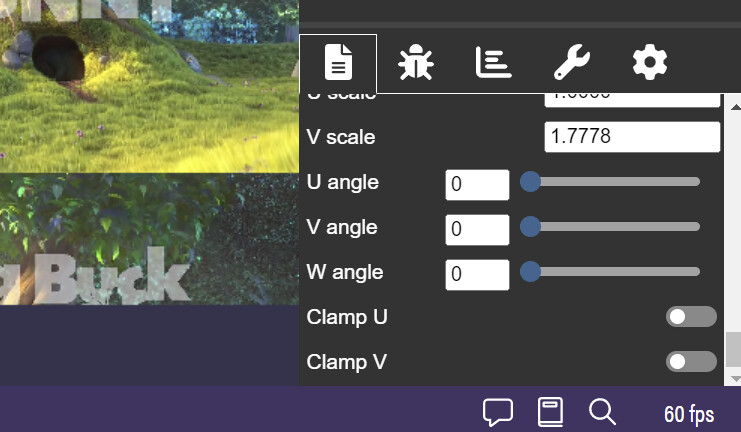
These lines come from “UV clamping,” which is where, when the texture is sampled at a point outside itself (with U and/or V outside the [0, 1] range) it “clamps” the sample point back to the allowed range and returns that, essentially just returning the nearest color. If you turn off this behavior in the Inspector, you can see the texture switch to “UV wrapping,” where values outside the allowed range “wrap around” and repeat through the allowed range again.
This essentially is the core problem you’ll need to address to solve the arbitrary case: if your texture doesn’t cover the entire mesh, what do you do with the “out-of-bounds” pixels? Built-in options are clamping, wrapping, and mirroring; for anything else, you’ll probably need to write your own shader.
(Twenty minutes later…)
I was going to write, “Thankfully, this won’t be too complicated a shader to write…” But then I asked myself, “Is that true?” then looked into it some more, then realized that this shader could actually be made using Babylon 5.0’s new logic nodes in NME, and then…
Babylon.js Node Material Editor (babylonjs.com)
…I kind of got sidetracked and made a version of the shader.  The vertex shader here is irrelevant; the relevant part is the three nodes “TopLeft,” “Scale,” and “OutOfBoundsColor,” which allow you to rescale the input texture (which in your case would be the video texture) to put it anywhere at any aspect ratio in the final render, then fill the remainder with an “out-of-bounds color” of your choice.
Hope this helps, and best of luck!