[SOLVED] Not Able to Add Animations to Mesh with a physicsBody and physicsShape

Hey everyone! :wave:

I have a question regarding animations which I have been stuck for a while. I have decided to use the animations inside Babylon Js, and use a simple mesh for now as the character instead of importing a glb file.

I was going through the docs for animating a character but my animations don’t seem to get applied to my mesh, possibly because it has a physics shape and body attached to it?

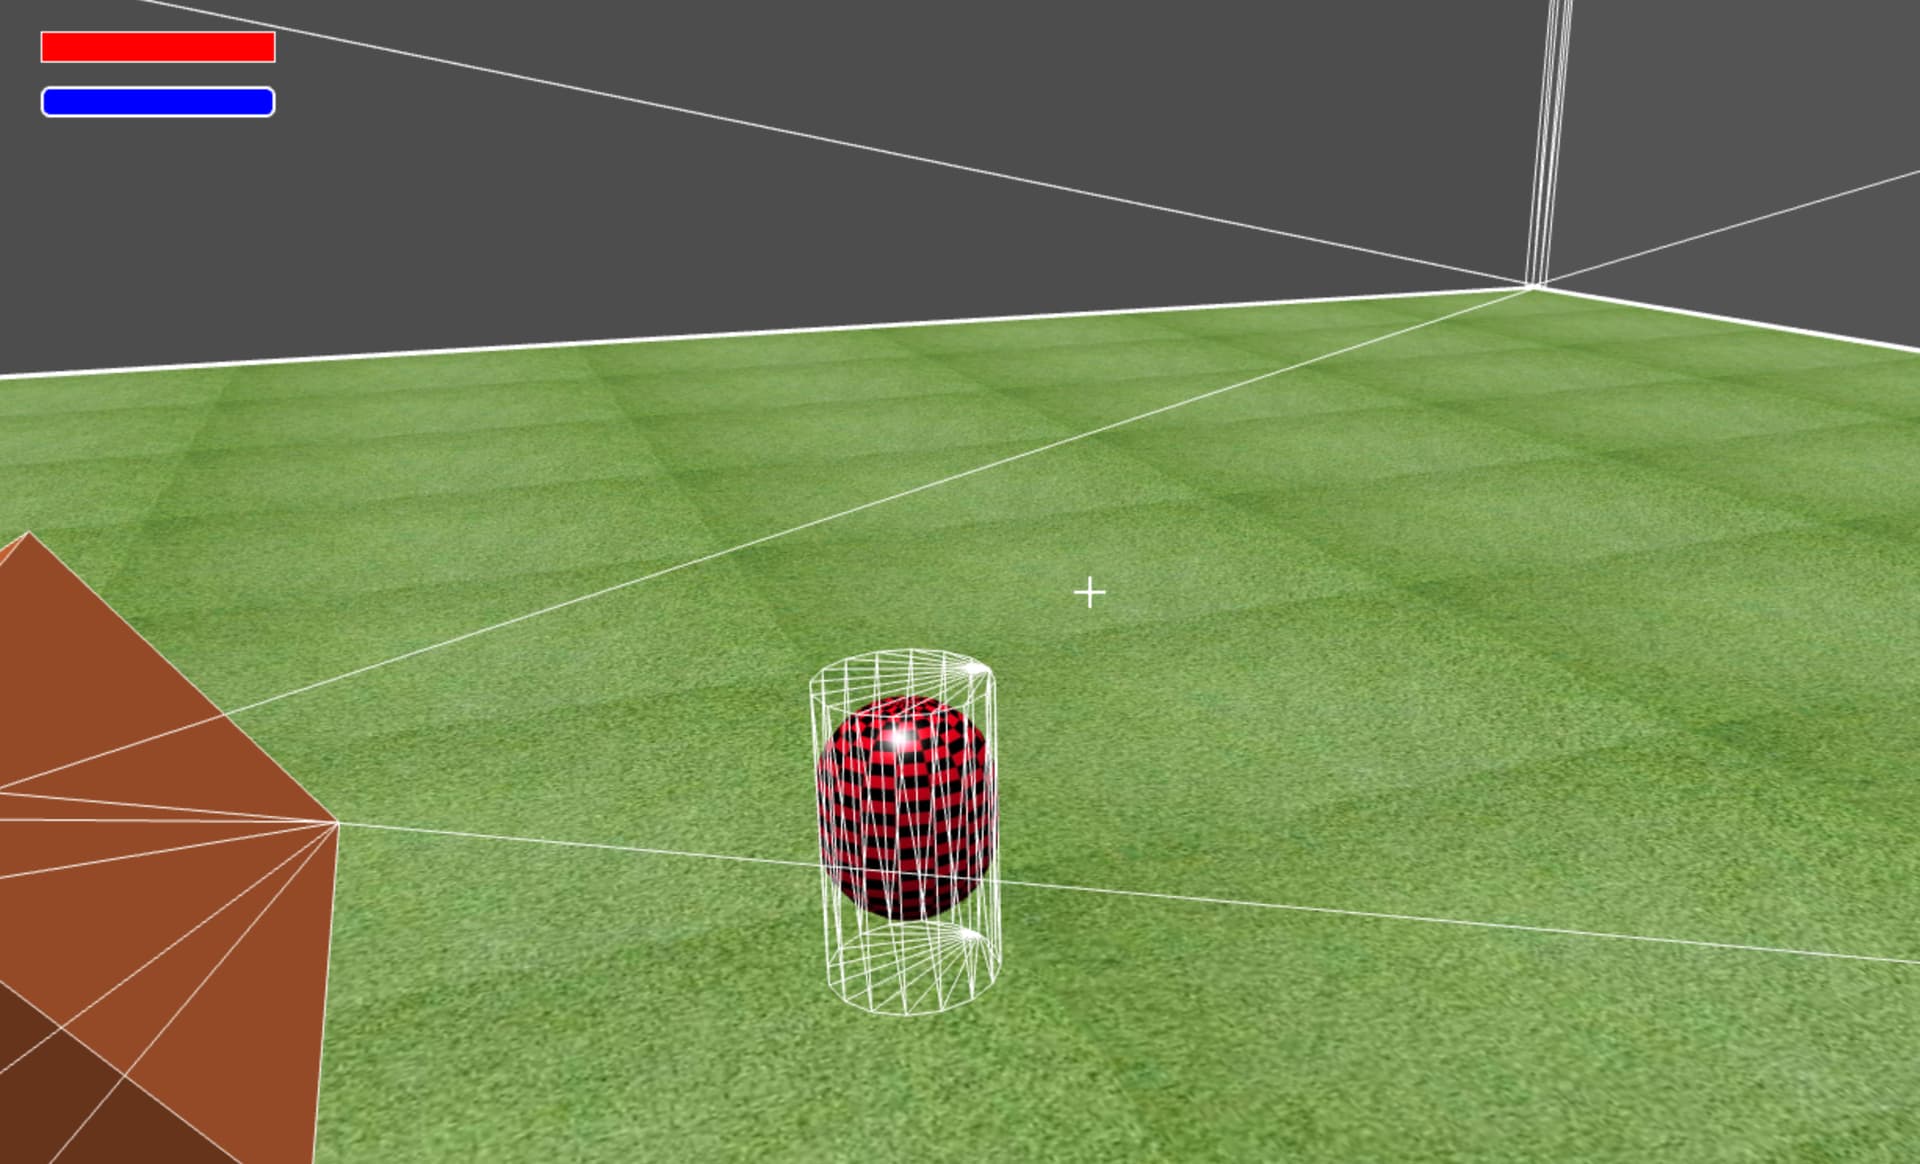
I’d like the visible mesh to move up and down within the cylinder physicsShape, for a hover effect. I’d also like it to tilt forward, backward, left and right slightly when moving in those directions. I have created a playerAnimations file as follows:

import { Mesh, AnimationGroup, Animation } from '@babylonjs/core';

export class PlayerAnimations {

    private idleAnimationGroup: AnimationGroup;
    private forwardAnimationGroup: AnimationGroup;
    private leftAnimationGroup: AnimationGroup; // If you're planning to add left animation
    private rightAnimationGroup: AnimationGroup; // If you're planning to add right animation
    private backwardAnimationGroup: AnimationGroup; // If you're planning to add right animation

    constructor(private mesh: Mesh) {
        this.idleAnimationGroup = this.createIdleAnimation();
        this.forwardAnimationGroup = this.createForwardAnimation();
         // Initialize other animations here if needed
        this.leftAnimationGroup = this.createLeftAnimation();
        this.rightAnimationGroup = this.createRightAnimation();
        this.backwardAnimationGroup = this.createBackwardAnimation();

    }


    playIdleAnimation() {
        // Stop all other animations
        this.stopAllAnimations();
        // Start the idle animation
        this.idleAnimationGroup.start(true);
    }

    playForwardAnimation() {
        // Stop all other animations
        this.stopAllAnimations();
        // Start the forward animation
        this.forwardAnimationGroup.start(true);
    }


    playRightAnimation() {
        // Stop all other animations
        this.stopAllAnimations();
        // Start the forward animation
        this.rightAnimationGroup.start(true);
    }

    playLeftAnimation() {
        // Stop all other animations
        this.stopAllAnimations();
        // Start the forward animation
        this.leftAnimationGroup.start(true);
    }


    playBackwardAnimation() {
        // Stop all other animations
        this.stopAllAnimations();
        // Start the forward animation
        this.backwardAnimationGroup.start(true);
    }


    // Methods for playing left and right animations...

    private stopAllAnimations() {
        this.idleAnimationGroup.stop();
        this.forwardAnimationGroup.stop();
        // Stop other animation groups as needed
        this.leftAnimationGroup.stop();
         this.rightAnimationGroup.stop();
    }

    createIdleAnimation(): AnimationGroup {
        const animationGroup = new AnimationGroup("Idle");
        const upDownAnim = new Animation("idleUpDown", "position.y", 30, Animation.ANIMATIONTYPE_FLOAT, Animation.ANIMATIONLOOPMODE_CYCLE);
    
        const keyFrames = [];
        keyFrames.push({ frame: 0, value: this.mesh.position.y });
        keyFrames.push({ frame: 15, value: this.mesh.position.y + 0.1 });
        keyFrames.push({ frame: 30, value: this.mesh.position.y });
        upDownAnim.setKeys(keyFrames);
    
        animationGroup.addTargetedAnimation(upDownAnim, this.mesh);
        // No need to start the animation here; it can be started when needed
        return animationGroup; // Return the animation group
    }
    
    createForwardAnimation(): AnimationGroup {
        const animationGroup = new AnimationGroup("Forward");
        const upDownAnim = this.createUpDownAnimation("forwardUpDown");
        animationGroup.addTargetedAnimation(upDownAnim, this.mesh);
    
        const tiltAnim = new Animation("forwardTilt", "rotation.x", 30, Animation.ANIMATIONTYPE_FLOAT, Animation.ANIMATIONLOOPMODE_CYCLE);
        const tiltKeys = [
            { frame: 0, value: 0 },
            { frame: 15, value: Math.PI / 18 },
            { frame: 30, value: 0 },
        ];
        tiltAnim.setKeys(tiltKeys);
    
        animationGroup.addTargetedAnimation(tiltAnim, this.mesh);
        // No need to start the animation here; it can be started when needed
        return animationGroup; // Return the animation group
    }

    createLeftAnimation(): AnimationGroup {
        const animationGroup = new AnimationGroup("Left");
        // Up and Down animation (reusing createUpDownAnimation method)
        const upDownAnim = this.createUpDownAnimation("leftUpDown");
        animationGroup.addTargetedAnimation(upDownAnim, this.mesh);
        // Left Tilt animation
        const tiltAnim = new Animation("leftTilt", "rotation.z", 30, Animation.ANIMATIONTYPE_FLOAT, Animation.ANIMATIONLOOPMODE_CYCLE);
        const tiltKeys = [
            { frame: 0, value: 0 },
            { frame: 15, value: -Math.PI / 18 }, // Slight left tilt
            { frame: 30, value: 0 },
        ];
        tiltAnim.setKeys(tiltKeys);
        animationGroup.addTargetedAnimation(tiltAnim, this.mesh);
        return animationGroup;
    }
    
    createRightAnimation(): AnimationGroup {
        const animationGroup = new AnimationGroup("Right");
        // Up and Down animation (reusing createUpDownAnimation method)
        const upDownAnim = this.createUpDownAnimation("rightUpDown");
        animationGroup.addTargetedAnimation(upDownAnim, this.mesh);
        // Right Tilt animation
        const tiltAnim = new Animation("rightTilt", "rotation.z", 30, Animation.ANIMATIONTYPE_FLOAT, Animation.ANIMATIONLOOPMODE_CYCLE);
        const tiltKeys = [
            { frame: 0, value: 0 },
            { frame: 15, value: Math.PI / 18 }, // Slight right tilt
            { frame: 30, value: 0 },
        ];
        tiltAnim.setKeys(tiltKeys);
        animationGroup.addTargetedAnimation(tiltAnim, this.mesh);
        return animationGroup;
    }
    
    createBackwardAnimation(): AnimationGroup {
        const animationGroup = new AnimationGroup("Backward");
        // Up and Down animation (reusing createUpDownAnimation method)
        const upDownAnim = this.createUpDownAnimation("backwardUpDown");
        animationGroup.addTargetedAnimation(upDownAnim, this.mesh);
        // Backward Tilt animation
        const tiltAnim = new Animation("backwardTilt", "rotation.x", 30, Animation.ANIMATIONTYPE_FLOAT, Animation.ANIMATIONLOOPMODE_CYCLE);
        const tiltKeys = [
            { frame: 0, value: 0 },
            { frame: 15, value: -Math.PI / 18 }, // Slight backward tilt
            { frame: 30, value: 0 },
        ];
        tiltAnim.setKeys(tiltKeys);
        animationGroup.addTargetedAnimation(tiltAnim, this.mesh);
        return animationGroup;
    }
    

    createUpDownAnimation(name: string) {
        const upDownAnim = new Animation(name, "position.y", 30, Animation.ANIMATIONTYPE_FLOAT, Animation.ANIMATIONLOOPMODE_CYCLE);
        const keyFrames = [];
        keyFrames.push({ frame: 0, value: this.mesh.position.y });
        keyFrames.push({ frame: 15, value: this.mesh.position.y + 0.5 });
        keyFrames.push({ frame: 30, value: this.mesh.position.y });
        upDownAnim.setKeys(keyFrames);
        return upDownAnim;
    }
}

And in my inputControls.ts have added to play these animations when the keys are pressed (or idle when nothing is pressed)


    public getInputVector(): Vector3 {
        let inputVector = Vector3.Zero();
        let moving = false;


        // Ensure that the keyboard is connected
        if (this.keyboard) {
            if (this.keyboard.getInput(87) || this.keyboard.getInput(38)) { // W
                inputVector.addInPlace(Vector3.Forward());
                moving = true;
                this.currentAnimation = "forward";
            }
            if (this.keyboard.getInput(83) || this.keyboard.getInput(40)) { // S
                inputVector.addInPlace(Vector3.Backward());
                moving = true;
                this.currentAnimation = "backward"; // Assuming you have a backward animation
            }
            if (this.keyboard.getInput(65) || this.keyboard.getInput(37)) { // A
                inputVector.addInPlace(Vector3.Left());
                moving = true;
                this.currentAnimation = "left";
            }
            if (this.keyboard.getInput(68) || this.keyboard.getInput(39)) { // D
                inputVector.addInPlace(Vector3.Right());
                moving = true;
                this.currentAnimation = "right";
            }
        }

        // If no movement keys are pressed, revert to idle animation
        if (!moving) {
            this.currentAnimation = "idle";
        }

        return inputVector.normalize();
    }

Then I try to call this in my Player Class update method:

 public update(animationRatio: number) {
    const currentTime = performance.now();
    const inputVector = this.inputControls.getInputVector();
    const isSprinting = this.inputControls.isSprinting();

    // Check the current animation state and play the corresponding animation
    // Inside your player class's update method
    switch (this.inputControls.currentAnimation) {
      case "forward":
          this.playerAnimations.playForwardAnimation();
          break;
      case "backward":
          this.playerAnimations.playBackwardAnimation(); // Make sure you have implemented this method
          break;
      case "left":
          this.playerAnimations.playLeftAnimation();
          break;
      case "right":
          this.playerAnimations.playRightAnimation();
          break;
      case "idle":
      default:
          this.playerAnimations.playIdleAnimation();
          break;
    }

    if (currentTime - this.lastLogTime > 300) {
        console.log(`Animation Ratio: ${animationRatio}`);
        this.lastLogTime = currentTime; // Update the last log time
    }

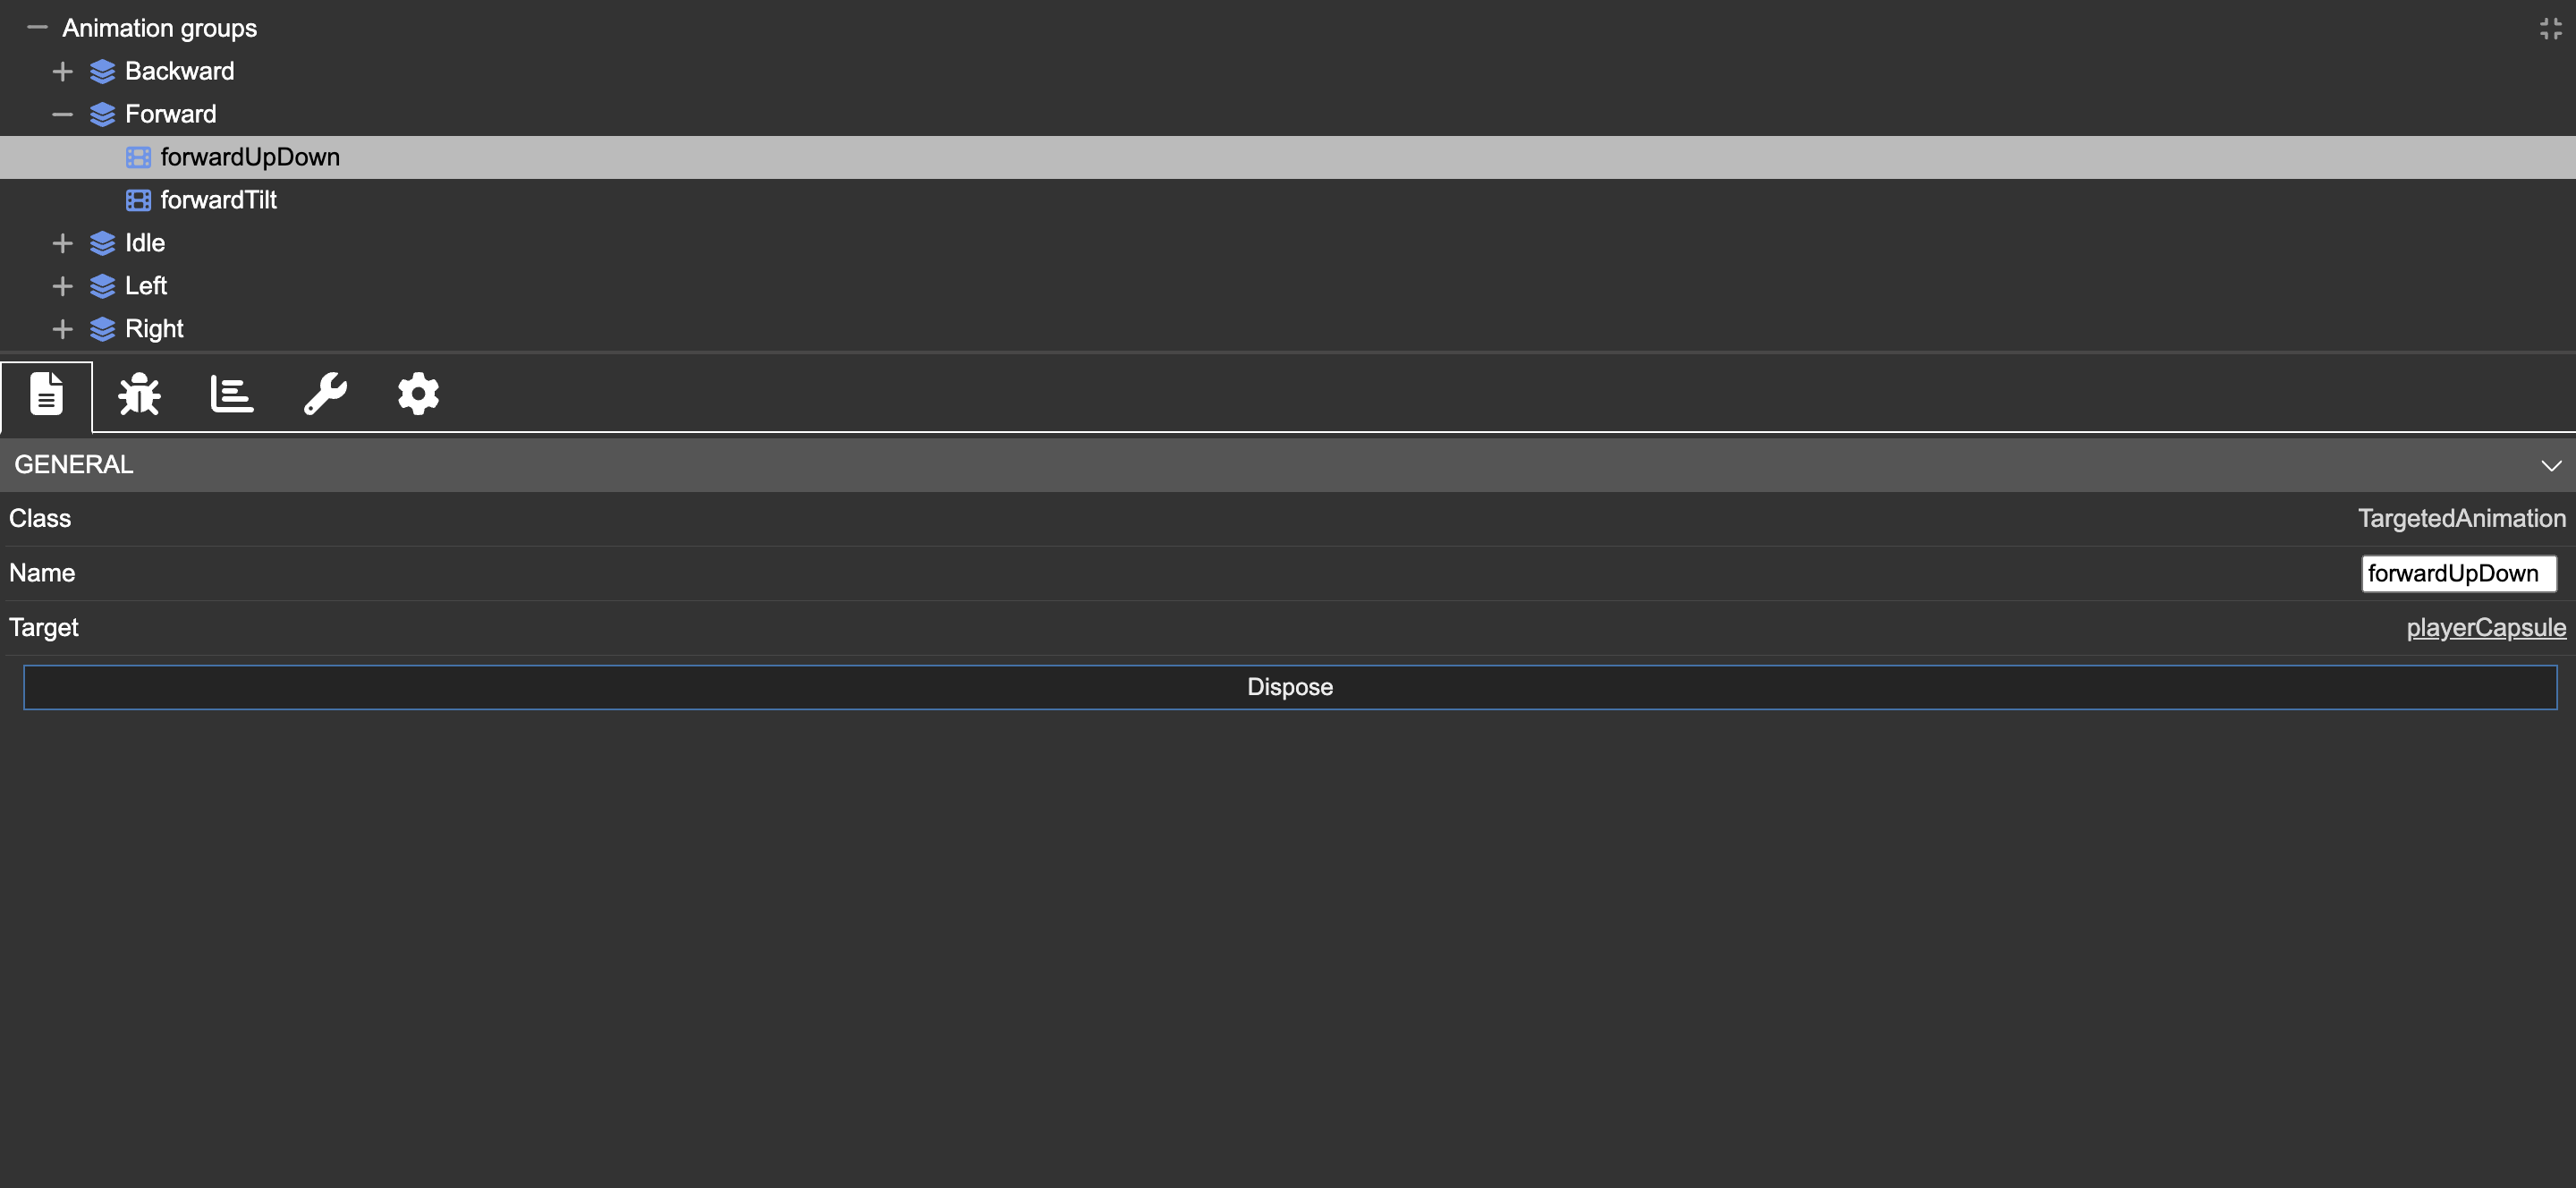
I don’t get any errors in the Console or in my IDE, but the animations don’t play. I can see the animationGroups in the inspector, but no animations are assigned to the mesh when you check playerCapsule Node:


I hope this makes sense, I’ve created a repo with this example here:

It should just run after:

git clone Open Source / BabylonTemplate · GitLab

cd babylontest

npm install

npm run dev

Any help on this would be really appreciated! Thanks :slight_smile:

cc @Cedric

Assuming you’re using Havok, you’ll want to enable the “PreStep” (allows updating mesh transforms by code outside of physics, e.g. from Animations)

physicsBody.disablePreStep = false;
1 Like

@aWeirdo Thanks for the suggestion!

I tried to simplify the animations so that I can test this approach. I removed the animation groups and applied an animation directly in the createPlayerMesh method:

createPlayerMesh() {
      // Create the player mesh as a capsule
      const capsuleOptions = {
          height: 2.5, // Height of the capsule
          radius: 1, // Diameter of the capsule
      };
      this.mesh = MeshBuilder.CreateCapsule("playerCapsule", capsuleOptions, this.scene);
      this.mesh.position.y = 4.5; // Adjust position as needed (half the height to sit on the ground)
      this.mesh.billboardMode = 2; // Facing the camera
  
      // Create and assign a material to the mesh
      const material = new StandardMaterial("playerMaterial", this.scene);
      material.diffuseTexture = new Texture("textures/coolTexture.png", this.scene); // Ensure this texture exists
      material.specularColor = new Color3(1, 1, 1); // Bright white specular highlights
      material.specularPower = 64; // Shininess
      this.mesh.material = material;
  
      // Define physics properties and attach them to the mesh
      // Assuming PhysicsBody and PhysicsShapeCylinder are available in your physics integration
      const cylinderShape = new PhysicsShapeCylinder(
        new Vector3(0, -2, 0),    // starting point of the cylinder segment
        new Vector3(0, 1.5, 0),    // ending point of the cylinder segment
        1,                          // radius of the cylinder
        this.scene                  // scene of the shape
    );
  
      // Assuming PhysicsBody is a wrapper for integrating with the specific physics engine
      const cylinderBody = new PhysicsBody(this.mesh, PhysicsMotionType.DYNAMIC, false, this.scene);
      cylinderBody.disablePreStep = false;

      cylinderBody.shape = cylinderShape; // Attach the cylinder shape to the physics body
      cylinderShape.material = { friction: 0.2, restitution: 0 };
      // Set the mass properties
      cylinderBody.setMassProperties({
        mass: 15,
        inertia: new Vector3(0, 0, 0), // Prevent rotation
        // Optionally set centerOfMass and inertiaOrientation if needed
        // centerOfMass: new BABYLON.Vector3(0, 0, 0),
        // inertiaOrientation: new BABYLON.Quaternion(0, 0, 0, 1)
    });

    // Set linear damping
    //cylinderBody.setLinearDamping(0.1);

    let baseY = this.mesh.position.y;
    let hoverHeight = 0.1; // Height of the hover effect
    let speed = 0.5; // Speed of the hover effect
    let time = 0; // Time accumulator

    this.scene.onBeforeRenderObservable.add(() => {
        // Assuming animationRatio is updated elsewhere in your update loop
        let animationRatio = this.scene.getAnimationRatio(); // Mocked, replace with actual source
        
        // Increment time based on the animation ratio
        // Adjust 'speed' as necessary to control the rate of the hover effect
        time += animationRatio * speed;

        // Apply the hover effect
        this.mesh.position.y = baseY + Math.sin(time) * hoverHeight;

    });
    
}

However, this breaks my jetpacking logic and some other things. Most likely I’m doing something wrong here :smiley: But I think I have 3 options:

  1. Instead of applying movement forces to this.mesh, I should apply to physicsBody. Then apply the animations to this.mesh as above.

  2. Create a visualMesh that clones the position of this.mesh, and apply the animation to the visualMesh while making this.mesh invisible.

  3. Apply the hovering effect as a physics force directly to this.mesh.

I’m not sure what the best approach to this, will try to experiment and see what has the best performance, or if anyone has other suggestions or see where I went wrong I’m all ears :slight_smile:

Edit:

I tried option 2 and it works great, with no real impacts on performance or memory at all. This is how i went about it:

  
    createPlayerMesh() {
      // Create the player mesh as a capsule
      const capsuleOptions = {
          height: 2.5, // Height of the capsule
          radius: 1, // Diameter of the capsule
      };
      this.mesh = MeshBuilder.CreateCapsule("playerCapsule", capsuleOptions, this.scene);
      this.mesh.position.y = 4.5; // Adjust position as needed (half the height to sit on the ground)
      this.mesh.billboardMode = 2; // Facing the camera
  
      // Create and assign a material to the mesh
     // const material = new StandardMaterial("playerMaterial", this.scene);
     // material.diffuseTexture = new Texture("textures/coolTexture.png", this.scene); // Ensure this texture exists
     // material.specularColor = new Color3(1, 1, 1); // Bright white specular highlights
     // material.specularPower = 64; // Shininess
     // this.mesh.material = material;
      this.mesh.isVisible = false; 

  
      // Define physics properties and attach them to the mesh
      // Assuming PhysicsBody and PhysicsShapeCylinder are available in your physics integration
      const cylinderShape = new PhysicsShapeCylinder(
        new Vector3(0, -2, 0),    // starting point of the cylinder segment
        new Vector3(0, 1.5, 0),    // ending point of the cylinder segment
        1,                          // radius of the cylinder
        this.scene                  // scene of the shape
    );
  
      // Assuming PhysicsBody is a wrapper for integrating with the specific physics engine
      const cylinderBody = new PhysicsBody(this.mesh, PhysicsMotionType.DYNAMIC, false, this.scene);
      cylinderBody.shape = cylinderShape; // Attach the cylinder shape to the physics body
      cylinderShape.material = { friction: 0.2, restitution: 0 };
      // Set the mass properties
      cylinderBody.setMassProperties({
        mass: 15,
        inertia: new Vector3(0, 0, 0), // Prevent rotation
        // Optionally set centerOfMass and inertiaOrientation if needed
        // centerOfMass: new BABYLON.Vector3(0, 0, 0),
        // inertiaOrientation: new BABYLON.Quaternion(0, 0, 0, 1)
    });

    // Set linear damping
    //cylinderBody.setLinearDamping(0.1);
    
}

createVisualMesh() {
  // Create the visual mesh, similar to the focus point but visible
  this.visualMesh = MeshBuilder.CreateCapsule("playerVisual", { height: 2.5, radius: 1 }, this.scene);
  this.visualMesh.position = this.mesh.position.clone();
  this.visualMesh.isVisible = true; // Make sure it's visible, or apply the desired material
      // Create and assign a material to the mesh
      const material = new StandardMaterial("playerMaterial", this.scene);
      material.diffuseTexture = new Texture("textures/coolTexture.png", this.scene); // Ensure this texture exists
      material.specularColor = new Color3(1, 1, 1); // Bright white specular highlights
      material.specularPower = 64; // Shininess
      this.visualMesh.material = material;
  // Assuming you want to mimic the billboard effect, if applicable
  // Adjust as needed based on your specific implementation or requirements
  this.visualMesh.billboardMode = this.mesh.billboardMode;

  // Parent the visual mesh to the physics mesh
  // This automatically syncs position and rotation but consider manual syncing if needed for specific cases
  this.visualMesh.parent = this.mesh;
}
private initHoverAnimation(): void {
  // Assuming this method is called after the visualMesh has been created and positioned
  this.visualMesh.position.y; // Initialize the current position of the visualMesh
}

private applyAnimations(animationRatio: number): void {
  this.time += animationRatio * this.speed;
  // Apply the hover effect
  this.visualMesh.position.y = Math.sin(this.time) * this.hoverHeight;
}

If you control completely the body/shape, you may try to use it with animatedMotion type.
I’d go with option2 as well. animation for for visuals seems enough.
Option 3 is difficult. Trying to control/constraint a dynamic body with forces is almost impossible.

1 Like

Thanks Cedric!

Option 2 is the one for sure, it works really well and gives me the ability to create characters and manage animations, while also allowing the body/shape to interact with physics.

1 Like