I have my scene with a lot of meshes in somewhat close proximity. When a user interacts with the scene, I want one of those meshes to be presented in a way that the user notices it (“highlight it”), even it he can’t see it directly as it may be hidden behind other meshes. When I started with my project, I simply gave the highlighted mesh an emissive color. I quickly notices that this wasn’t enough, so now I’ve been searching for a better solution.
I’ve tried adding a highlight-layer, but that doesn’t work since it’s still hidden behind the other meshes. The other thing I tried is setting mesh.renderingGroupId of the mesh that I want highlighted to 1. This effect can be seen here. This is better since it lets the user see the mesh through (any number of) other meshes, but it just looks weird.
I tried setting the material of the highlighted mesh to wireframe, which makes it look way better when viewed through other meshes, but when the user sees it directly, I want him not to see the wireframe, but instead the normal material. Is it somehow possible to do this?
Another thing I thought about is adding the edges of the mesh (it’s mostly in a square shape) to renderingGroup 1. Would I need to create extra meshes to represent those lines and add those to the renderingGroup or can I somehow infer those edges from the mesh itself?
I’m sorry if my question is unclear, If you don’t understand it just tell me and I’ll try to explain it better .
Yeah I noticed that depth gets lost when I apply a different renderingGroup. That’s why I thought maybe putting only the outlines onto a different renderingGroup would look better.
Do you think it would be possible / a good idea to draw a line/ray from the camera to the mesh, see if it intersects with any mesh and if not, change the renderingGroupId back to 0?
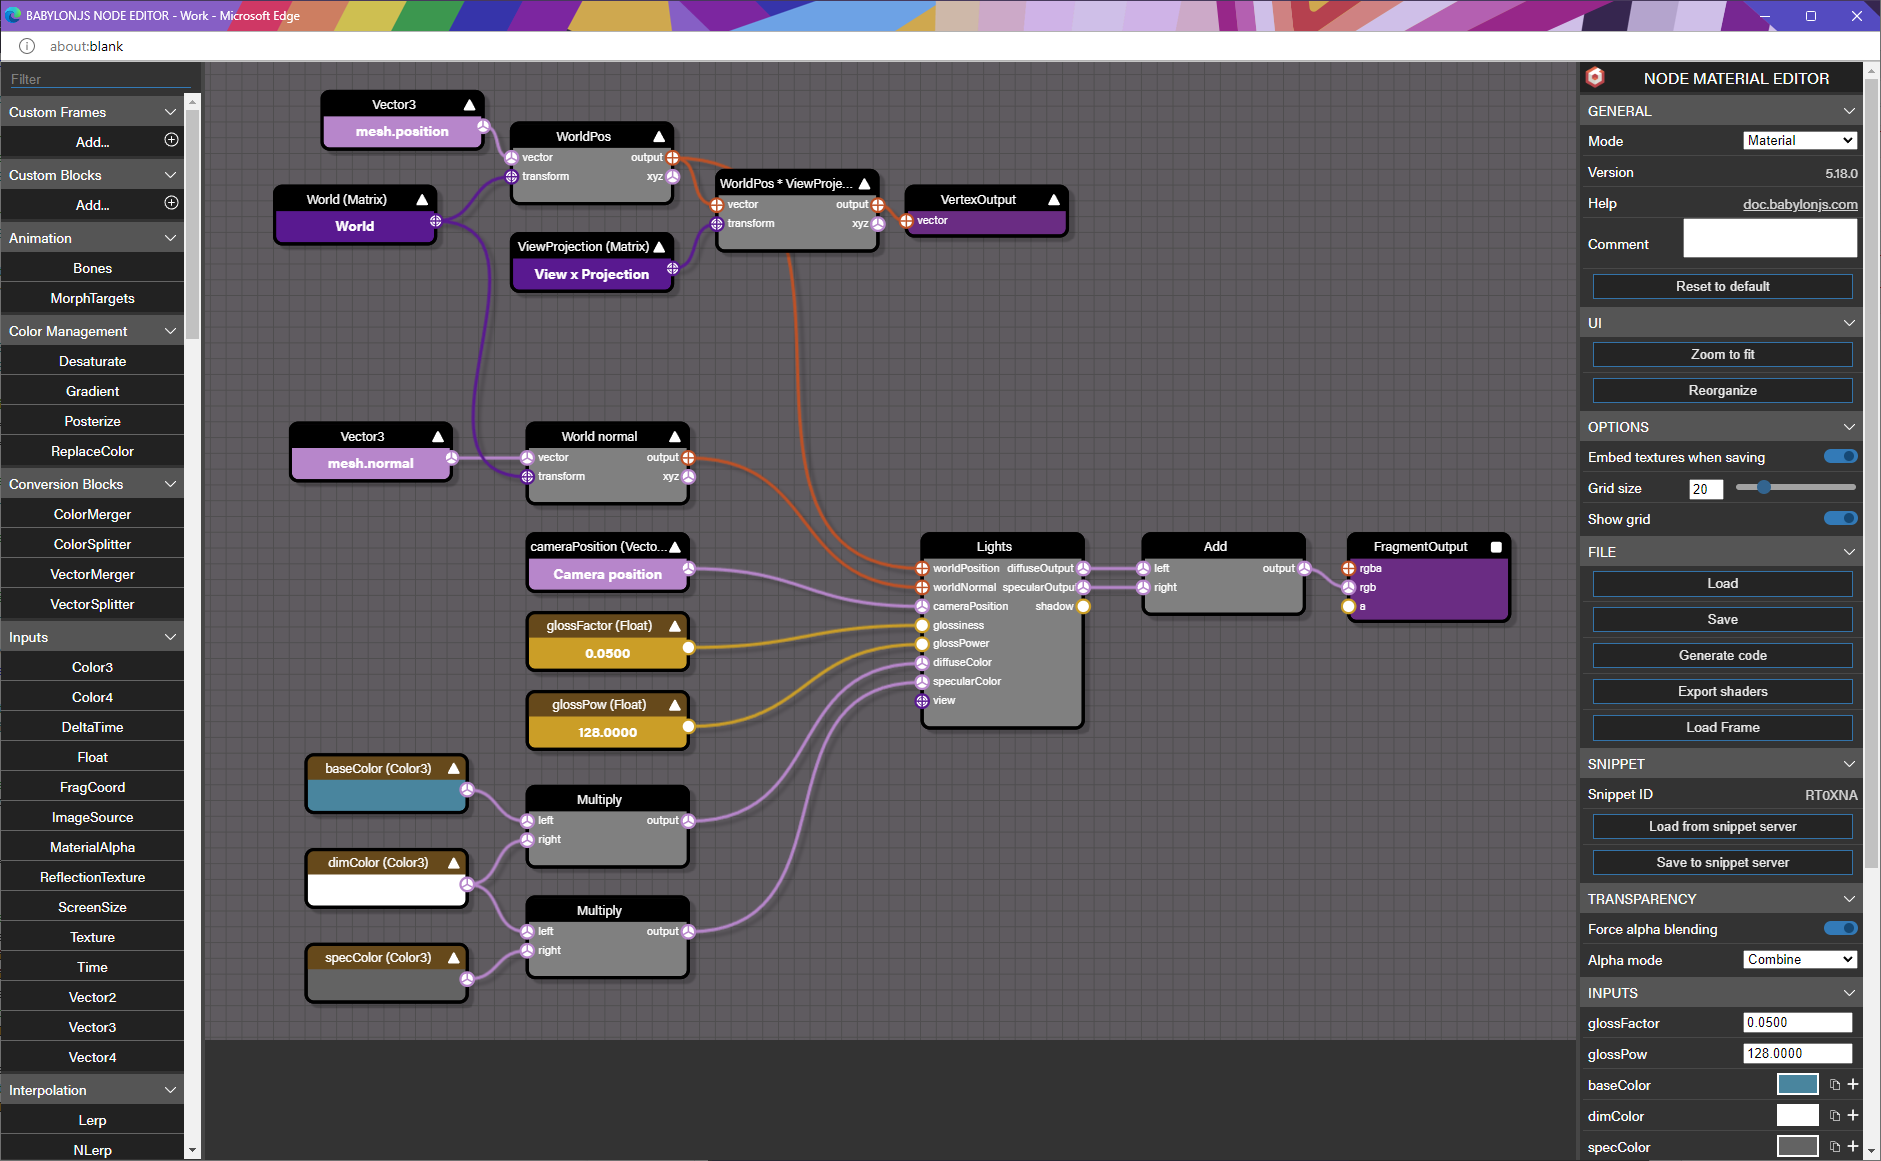
@marsh, here is one approach to handle this. Basically what I am doing is assigning a very simple node material to the wall mesh. This simply multiplies two Color3s together, one that is your base color and the other that will be the color to dim the base color with. When we switch the material to an additive blend mode, a darker base color will be more transparent.
You will notice I also added in our standard blinn-phong lighting model just so we could see definition on the wall mesh, but not that I also multiply the specular color with the dim color to also make the specular highlights transparent as well. So now when you rotate the camera until the wall is in front of the sphere, the wall will go transparent so you can see through it.
So why use an additive blend mode and not alpha transparency? Well put simply it’s cheaper and you don’t need to worry about sorting issues. With alpha transparency, we need to render the background pixel before rendering the foreground pixel to be able to render the pixel transparently. When you have multiple objects on top of each other with transparency, you need to render the background pixel plus each transparent pixel on top of that background to determine the final output for every pixel of your mesh. When we are simply adding each pixel to the one below, we don’t need to walk through all of the transparent objects to determine the final color, the pixel just adds to whatever is below it.
This means that you do need to be careful if you are stacking up many meshes as each one adds to whatever is below it, but you can account for this by using very small values for each add. You will also see that areas with lots of overlapping meshes will be brighter and imply there is more overlap.
You can also make the shader simpler by using a float instead of a color to dim with and just scale the base color. However, you can also make use of the color3 to tint as well as darken the base color. Or you can add in a desaturate node as well to desaturate while dimming. There are a lot of different options here.
To make use in your scene, you can ignore the rotational logic in that PG and simply run through an array of objects that need to dim and change their alphaMode and dim color accordingly. You could also do some highlighting of the chosen mesh, but this may be a good enough starting point for you. Let me know if you have any questions.
Thank you so much, this is absolutely amazing! I didn’t even think about using a custom node material, but it works so good. I had some fun with trying to edit the nodematerial, since this is my first time using it and it’s looking very promising.
Thank you also for the extensive explanation, it really helped me get an insight on how some things work.