Anyone have some good numbers for a “Paper” PBR material?
Pinging @sebavan
Ohhhh never tried this  maybe @PatrickRyan ?
I am quite interested in the answer 
I was messing around with some origami in a scene when I realised tissue paper is hard… any help would be appreciated.
You could look into using a bunch of textures 
Here is what I found for paper at current computer - five 4K paper textures, probably from Arnold.
I will dig into more paper (and book cover) texturing quite soon, since we produce a lot of real paper books and I will look for the ways to present books and cover materials in 3D. Let me know about your results
Im looking to do it without textures.
Or maybe you could make a tool that takes pbr values from a pbr material that uses textures
hmm thats kinda a novel idea. I might have to take a look at that.
Like you select a specific pixel or a range and it averages it?
I would take Substance Painter
Slap a Paper material on it and extract all needed PBR textures.
Or if you arnt that Artistic you could try Substance Alchemist.
Or grab one from Quixel Megascans and pimp it up in Mixer.
I think I’m just going to grab single pixel values after I make it look the way I want in substance designer.
Though it would be nice to have the ambient occlusion… hmmm maybe I should just use textures.
@Pryme8, I think you will get much further with textures as you will want to create variation in the paper which is cheaper to do in a texture than calculating at runtime. My go to would be Substance Designer to make a tiling texture that can be applied to whatever model you want. The standard smart materials in Painter are great, but very recognizable because a lot of people tend to grab and use them. If you go that route, I would spend some time working on them to make them unique.
The biggest thing you have to worry about with tissue paper is translucence. If you look at tissue paper you will see there is more pulp in some areas than others (created by the calendar roll in the paper making process) so that the transmittance of light isn’t even through the paper. To really make the paper feel like tissue paper, you need to make it feel like light transmits through the paper unevenly. You will also want to add a sheen to the paper for glancing angles to reflect more light.

We have sheen added to our PBR stack but have not had the time to add in a true sub-surface scatter into our PBR materials. It is on the list, but @sebavan has been locked down on other work for a while now even though I know he really wants to get this in.
The other path to this would be to create a custom shader in our Node Material Editor, but we have not added PBR nodes into this yet. We can reproduce a Blinn/Phong model like our standard material, but do not have IBL nodes created yet. This will be in version 2 of NME.
If you’d like me to take a swing at a custom tissue paper shader through NME with a tiling material, I’d be happy to do it as a video tutorial for the team. Let me know if you have more specific questions in the mean time.
I was actually able to get the effect close to what I want In substance painter, once a thickness texture is applied it will really play the effect well.
thanks for yalls help.
Actually @PatrickRyan I would like to see what you can come up with cause mine is really not getting the effect I want:

Here are the maps that I came up with.
Reflectivity

Thickness

Albedo

Ambient

Normal

Im hoping to get more of a visual like the real tissue paper that you posted.


@Pryme8, I apologize for the delay in my response. While I was making this texture and testing it out, I uncovered a couple of missing features in the Node Material Editor that we needed to get in for this to work. So thanks to your question, the Node Material Editor is better than before!
Ok, now let me jump into what I did. I wanted to create a custom lighting model to help with translucency and not rely on transparency. To that end, there are a couple of caveats to what I built that I want to lay out first:
- I wanted to use the Node Material Editor (NME) because we are throwing everything at NME to make sure it can do everything it needs to.
- Because this is v1 of NME, we have concentrated on being able to make the Babylon standard material in NME and will leave PBR until v2 to make sure we built a solid base for the tool and didn’t throw everything at it at once.
- Because NME reproduces a standard material, we have to author textures for the Blinn/Phong lighting model using spec/gloss and can’t take advantage of IBL. This is the biggest trade off I made as I prefer to author for PBR, but it was not an option here.
- I wanted to incorporate thickness in this asset for transmission of light through the paper when light is behind the paper. This demo uses only a single directional light, but it should scale.
- I knew that I wasn’t going to be extremely happy with the final asset as I have spent most of my time on the team trying to improve our rendering and most of that work has been to push our PBR rendering to feel more like a ray traced render. With only Blinn/Phong and no IBL, I would not reach the bar I set for our demos when trying to make this look like real paper.
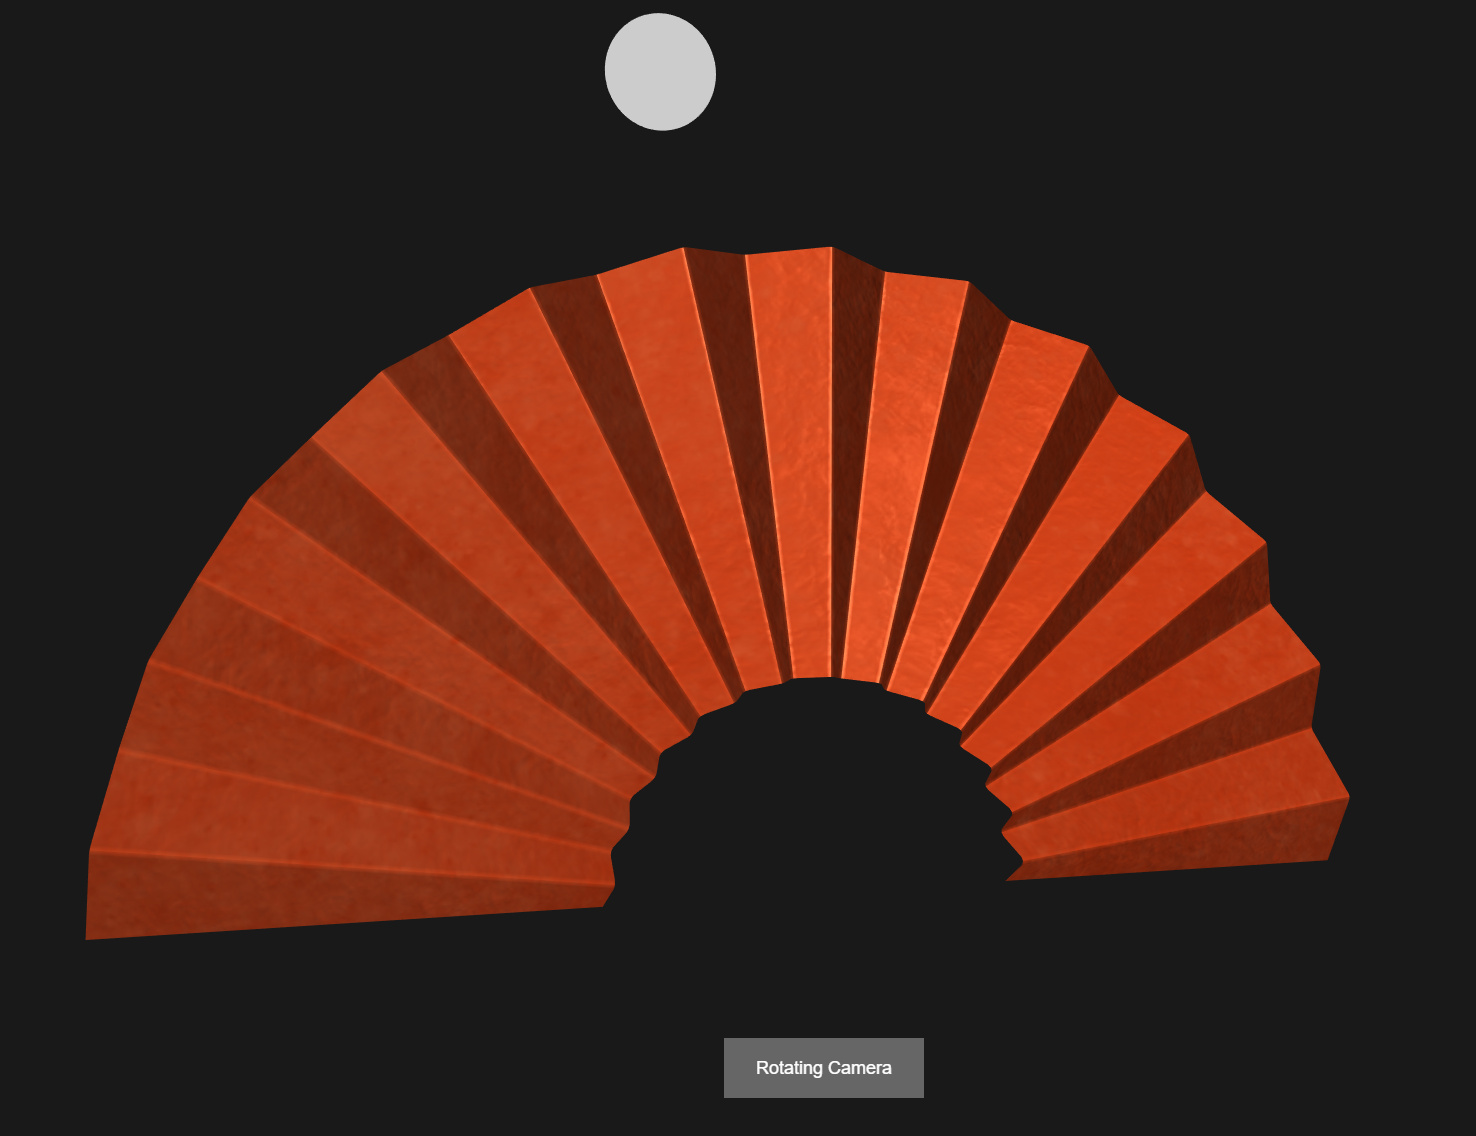
That out of the way, let me generally walk you through what I did without breaking down the whole shader line by line (you can look at the graph to see everything). I quickly made a simple fan-like asset that is not a manifold mesh. It only has one side to it, so we are going to turn off backface culling in the demo. I also dropped a sphere in the scene to simulate where the light is coming from. The analytical light is just a directional, but the sphere rotates to match the direction of the light if aimed at the center of the mesh. And there is a button in the demo to allow you to rotate the camera or the light so you can get a good look at the shader.
https://playground.babylonjs.com/#APYMMF
This is the front of the mesh (the actual front faces as lit by the directional light).
This is the back of the mesh (the back faces that are not culled) which is made to appear that there is light leaking through it.

This is also the back where the paper is directly between the camera and the directional light. I have added some extra brightness to the color in the backfaces and used the gloss texture as a mask for the brighter color. I used the gloss texture just for speed’s sake, but you can use whatever thickness texture you want.

This is the part of the node material that deals with our custom two-sided lighting. The Front Facing node is one of the new features that we added for this demo which returns 1 for front faces and 0 for back faces for a mesh. I am using world mesh normals and the inverse of those normals in a lerp with Front Facing used as the gradient so I can create different lighting for each side of the mesh.

This portion of the graph sets up the glow when the light is behind the paper. There are two things happening here. I am taking the dot of the light and camera and remapping to a small range so that we only see white when the view direction is close to parallel to the light direction. I do the same thing with the dot between the surface normal and the light direction so that when the normal is close to parallel with the light direction, so that we only transmit light on surfaces that are close to perpendicular to the light. Multiplying these two together gives us surfaces that would be lit when the paper is between the camera and the light. Then we lerp between the highlight color and the original backface color based on thickness.

You can do much more with this asset, but I had to cut it off so that I could report back to you on what I was working on. If you have more questions or want more clarification, please feel free to ask. I hope that you see that you can do quite a bit with NME and I hope this inspires you to find some creative new approaches to what you are doing. Take care!